 Tampa Roofing
 Why Valrico Homes Need Siding Built for This Climate
Valrico sits inland from Tampa Bay in Hillsborough County, but "inland" doesn't mean sheltered. Homes here still take a beating from the same weather that hammers the rest of the Tampa metro: long, humid summers, intense year-round UV exposure, sudden downpours that come in sideways on gusty afternoons, and the real risk of hurricane-force wind during storm season. When a named storm tracks through the bay area, the wind can carry moisture and salt-laden air well inland, which means Valrico siding doesn't get a pass just because it's not beachfront.
Add in Florida's freeze-thaw-free but heat-cycle-heavy climate — surfaces baking in full sun for hours, then cooling fast during a summer storm — and you have conditions that punish any siding product with a weak moisture strategy or an unstable finish. Siding in Valrico isn't just cosmetic. It's the first line of defense for the wall assembly behind it, and it needs to be installed correctly to do that job for decades, not years.
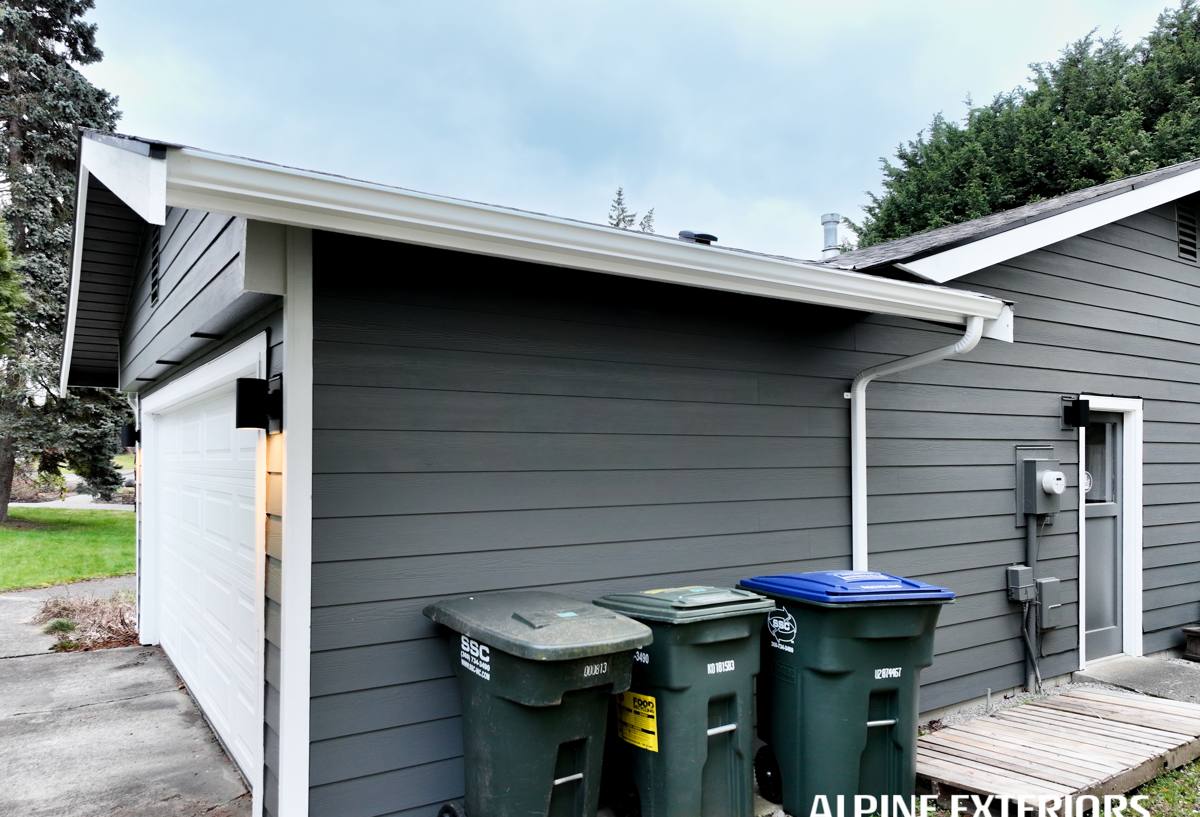
What "Correct" Siding Installation Actually Involves
Most siding failures we get called out to inspect aren't material failures — they're installation failures. The product on the wall might be fine; the way it was put on the house is what let water in. A correct installation isn't just nailing boards to studs. It involves a sequence of details that have to happen in the right order, every time.
The Moisture Management Layer
Before a single piece of siding goes up, the wall needs a continuous water-resistive barrier, properly lapped so water sheds outward and down, never inward. Every penetration — outlets, hose bibs, light fixtures, vents — needs to be flashed and sealed back into that barrier, not just caulked over after the fact.
Flashing at Every Transition
Windows, doors, rooflines, and any point where siding meets a dissimilar material are where water finds its way in. Proper head flashing, kick-out flashing at roof-to-wall intersections, and weep paths at the bottom of the wall assembly are non-negotiable, even though none of them are visible once the job is finished.
Fastening and Clearances
Fiber cement has to be fastened per the manufacturer's specifications — correct fastener type, spacing, and depth — or the warranty is void and the board can crack or work loose in high wind. Siding also needs proper clearance from grade, roofing, decks, and patios so it isn't sitting in standing water or trapped moisture.
Caulking and Paint Lines
Factory-finished siding is engineered to be sealed at the factory on all four edges. Field cuts need to be sealed with the right products at the right joints — and only at the joints that are supposed to be sealed. Over-caulking traps moisture just as effectively as under-caulking lets it in.
Why We Only Install James Hardie Fiber Cement
We install James Hardie exclusively. Not because it's the only decent product on the market, but because after years of installing and repairing siding across the Tampa area, it's the system we trust to hold up to Hillsborough County's combination of heat, UV, humidity, and wind — and to still look right ten and twenty years later.
Hardie fiber cement is non-combustible, which matters in a state where wildfire and lightning-strike fires are a real, if less-discussed, risk. It's dimensionally stable, meaning it doesn't expand and contract with heat and moisture the way wood-based products can, so seams and paint lines stay tighter over time. And it's manufactured in climate-specific HZ formulations — HZ5 for the Southeast — engineered specifically for regions that see the moisture and humidity load Florida does.
ColorPlus Factory Finish
Rather than field-painted siding, Hardie's ColorPlus finish is baked on in a controlled factory environment, which gives it more consistent color, better UV resistance, and a longer service life before repainting than most field-applied paint jobs — a real advantage under Florida's sun load.
Product Lines We Work With
Depending on the look a Valrico homeowner wants, that typically means HardiePlank lap siding for a traditional look, HardieShingle for accent or full-elevation shingle-style siding, and HardiePanel for board-and-batten or vertical applications. All are backed by a strong, transferable manufacturer warranty when installed to Hardie's specifications — which is exactly why installation quality matters as much as product choice.
What We Don't Install, and Why
We get asked about vinyl siding, LP SmartSide, and other engineered wood or composite products regularly. Vinyl is inexpensive and easy to install, but it's a thin plastic skin that can deform in extreme heat, become brittle over time in constant UV, and is rated for wind speeds that don't always match what a storm-prone area like Hillsborough County can deliver. Engineered wood products like LP SmartSide perform reasonably well when detailing is perfect, but wood-based cores are inherently more sensitive to moisture intrusion than fiber cement, and Florida's humidity leaves very little room for installation error.
None of that means those products are junk — they have their place, and plenty of homes around the country wear them fine. It means we made a professional call to standardize on one system we can install, warranty, and stand behind with confidence in this specific climate, rather than offering a menu of products with different risk profiles.
Our Installation Process
- On-site assessment. We walk the exterior, check the existing wall assembly, look for signs of past moisture intrusion, and measure for material.
- Detailed estimate. You get a clear scope of work — what's being removed, what's being installed, and what the moisture barrier and flashing plan looks like.
- Tear-off and inspection. Old siding comes off and we inspect the sheathing underneath for rot or damage before anything new goes up.
- Weather barrier and flashing. The water-resistive barrier and all flashing details go in first, before any siding is hung.
- Hardie installation. Siding is installed per manufacturer fastening and clearance specs, with joints and penetrations properly sealed.
- Final walkthrough. We review the finished job with you and confirm everything lines up with the original scope.
Signs a Valrico Home May Need New Siding
- Visible cracking, buckling, or warping, especially on the sun-exposed south and west elevations
- Soft spots or discoloration near the bottom of walls, which often points to moisture wicking up from grade
- Paint that's peeling or bubbling faster than it should, a sign moisture may be trapped behind the surface
- Gaps opening up at seams, corners, or trim after a few storm seasons
- Rising cooling bills that can't be explained by anything else, which sometimes points to a failing wall assembly
- Visible fastener heads working loose or "popping" over time
Any one of these on its own isn't necessarily an emergency, but they're worth having looked at before the next storm season tests the wall assembly for you.
Cost Factors for a Valrico Siding Installation
Every home is different, and we'll always give you a firm number after an on-site look — but these are the main variables that move the price on a real job.
| Factor | Why It Affects Cost |
|---|---|
| Home size and elevation count | More square footage and more wall complexity (dormers, bump-outs, multiple stories) means more material and labor |
| Tear-off and substrate condition | Rotted sheathing found during tear-off adds repair work before new siding can go on |
| Siding profile chosen | Lap width, shingle-style accents, and board-and-batten all have different material and labor requirements |
| Trim and detail work | Corner boards, window trim, and frieze boards add finish-carpentry time |
| Access and site conditions | Fencing, landscaping, pools, and tight lot lines can slow staging and installation |
| Color and finish selection | Factory ColorPlus finishes versus field-painted options carry different material costs |
Why It Matters That We Already Work in Valrico
Hillsborough County's permitting and wind-load requirements apply to siding replacement, and a crew that's already pulled permits and passed inspections in this area knows what the process actually requires — not just what's written in general code. Local experience also means knowing how Valrico's mix of housing stock, from older single-story homes to newer two-story builds, tends to be framed and sheathed underneath, which shapes what we expect to find at tear-off and how we plan for it.
There's also a simple practical benefit: a crew already working the area can typically get to your project, order material, and schedule a start date without the delays that come from a contractor working far outside their normal service footprint. When a storm forecast tightens a timeline, that local proximity is worth something real.
Caring for Your Siding After Installation
- Rinse siding periodically with a garden hose to clear pollen, salt residue, and general grime — a pressure washer isn't necessary and can damage caulk lines if used incorrectly
- Keep sprinklers from spraying directly on siding for extended periods
- Trim back landscaping so it isn't holding moisture against the wall
- Reseal or touch up caulking at joints if it starts to crack or pull away over the years
- Have the exterior looked at after any major storm to catch small issues before they become bigger ones
If your Valrico home's siding is showing its age or you're planning ahead of the next storm season, we're happy to take a look and walk you through what correct, code-compliant Hardie installation looks like for your specific house. Reach out for a free, no-pressure estimate using the form below.